May 13, 2020 | Cooking, Recipes |

I was all set to write about baking bread today. Then I read that there’s a shortage of flour and yeast. What??? It seems that Americans everywhere have become obsessed with baking, especially sourdough baking, and this is causing shortages in grocery stores. I was vaguely aware of this – it’s hard to avoid all the pictures of homebaked everything on Facebook, and a friend just send me some desiccated sourdough starter of my very own – but it wasn’t until today that I encountered the term “flour privilege.” Millie would be horrified.
I guess I’m one of the privileged, entirely by accident. I buy my flour in bulk and have for years. I have two canisters that hold 25 lbs. of flour each, one for white and one for whole wheat, the latter of which I recently loaned to a good friend when we split a 50-lb. bag of bread flour. My whole wheat now resides in a 10-lb. container, and it’s still a little more than half full after the four loaves of bread my elder daughter made today. I just ordered 20 lbs. of rye flour (a four-pack of 5-lb. bags because I don’t go through it as quickly). And yes, I also buy yeast in bulk, usually in 1-lb. packages, and have been sharing it with friends as well.
It hadn’t occurred to me that some people might be having trouble finding yeast in the stores, or even basic flour, and I don’t want to flaunt my flour privilege! Instead, let’s make something that requires no flour or yeast at all and teaches us a little science along the way: ice cream.
Wait! you say. Don’t you need an ice cream maker for that? Well, spoiler, I have one of those, but it’s not necessary. Ice cream needs no technology more advanced than zippered plastic bags and eager, energetic children. If you have those and a few simple ingredients, you are all set.
Ice Cream in a Bag
- 1 cup half and half (or 1/2 cup milk and 1/2 cup cream)
- 1.5 teaspoon vanilla extract
- 1 Tablespoon sugar
- ice
- 1/4 cup salt (rock salt is best, or at least cheapest, but any salt will do)
- Zippered plastic bags, 1 small and 1 large
Place the first three ingredients in the small zippered bag and seal it well, squeezing out as much excess air as possible while you seal it. This is important. If your bag doesn’t seal well, or if it pops open because it has too much air in it, you will end up with yucky, salty ice cream. You can try double-bagging it or adding some duct tape to make certain it stays shut.
Place the ice and salt in the large zippered bag, then add in the VERY WELL-SEALED small zippered bag. Seal the large zippered bag as well.
Convince your excited, enthusiastic children who have been cooped up for entirely too long to put on their warm winter gloves. They will look at you like you’ve gone insane, but that’s all right. Most children will do just about anything for ice cream. Once they’ve got their gloves on, hand them the bag and tell them to shake it HARD until the liquid turns mostly solid. If your children are very young, I recommend that you do this outside, just in case. Note: they will get impatient. They will whine and complain that they’re tired and they want the ice cream RIGHT NOW. Point out that the longer they shake it, the better it will taste.
Eventually, the cream will, in fact, solidify, and you’ll get about two small servings of ice cream out of it. I recommend cutting one corner of the very well-sealed bag and squeezing it out like soft serve as this is much less messy and awkward than trying to spoon it out of the bag. Best of all, your children will be tired enough from all that shaking to offset the sugar rush they’re about to get from the ice cream.
And now, SCIENCE!
What? Despite all my warnings, the salt got into your ice cream, and it tastes disgusting? You want to know why we needed the salt in the first place? Well, I am so glad you asked me that!
Salt makes ice colder.
Wait, you don’t believe me? After all, we use salt to make ice melt on sidewalks, right? Doesn’t that make ice warmer?
Actually, that’s not exactly what happens. Salt lowers the temperature at which water freezes. Water usually freezes at 32 degrees F, but milk and cream won’t freeze until they’re even colder. When you add salt to the ice, some of the ice will melt, but the mix of this water and the remaining ice will get even colder, cold enough to freeze the cream. This is why your kids need their gloves – the bag will get very cold! And this is why they need to keep shaking the bag, to circulate the cold slushy mix around the smaller bag and also to keep ice crystals from forming inside the cream, the way it does when you try to refreeze melted ice cream.
See! You’ve just taught your kids the concept of melting points and conned them into making their own dessert. YOU ROCK! If you’d like to try this again while channeling your inner PE coach as well, you can purchase an ice cream kick ball, which the kids can kick all around the yard to make their ice cream. I do recommend buying rock salt along with it. It’s much less expensive, though it has impurities that make it even nastier to eat. Fortunately, the kick ball is much better at keeping the salt out of the ice cream.
(Psst! Kids! This is a fantastic way to convince parents to let you eat ice cream pretty much any time! Just tell them you’re learning science and getting exercise at the same time. Then tell them they’re epic for being such cool parents.)
If you’re still disappointed because you don’t have any yeast and can’t make bread, here’s an Irish soda bread recipe (don’t worry, there’s a smaller version of the recipe so you don’t end up making enough for 250 people). And if you have no flour at all, here’s a great Swedish cake recipe made with mashed potatoes and ground almonds.
Apr 29, 2020 | Cooking, Recipes |

These days, I find myself making a lot of things from scratch that I might not ordinarily make: ice cream, pasta sauce, bread. Okay, actually, I make bread all the time, but not usually in these quantities! But I realized that if I’m making that much bread dough, I may as well make other fun things out of it, such as pizza. It’s really pretty easy to make at home, especially if you have a pizza stone. If you don’t, no worries. An ordinary baking sheet will do.
The lovely thing is, you can top it with whatever you have handy. You don’t have to use mozzerella. Try goat cheese, blue cheese, or cheddar with cooked ground beef to make a cheeseburger pizza. Find toppings in the back of your pantry, freezer, or fridge: olives, anchovies, spinach, broccoli, butternut squash, breakfast sausage. No tomato sauce? Try alfredo sauce or plain olive oil for a white pizza. Experiment! This is a great opportunity to try new things.
Start with the crust about 2.5 hours before dinnertime.
Pizza Crust
(This is just a simple white bread recipe. If four crusts is too much for you, you can put half the dough in a loaf pan and make nice white sandwich bread. You can also refrigerate the dough for up to a week. Just let the dough warm up for 20 minutes before rolling it out.)
- 1.5 Tablespoons dry yeast
- 1.5 Tablespoons salt
- 3 cups lukewarm water
- 6.5-7.5 cups all-purpose flour
Throw these willy nilly into a mixer bowl and knead using a dough hook or by hand until the dough is smooth, pulls away from the sides of the bowl, and stops sticking to your fingers. You may need to add extra flour on a humid day. Cover loosely and allow to rise for two hours.
About 15 minutes before the dough finishes rising, preheat the oven to 475 degrees F. If you have a pizza stone, put it in the  oven now. If you like a crispy crust, add the bottom of a broiler pan on the lowest rack. If you are using a pizza stone and have a pizza peel, dust the peel with cornmeal. Otherwise, a baking sheet with parchment paper for each pizza you plan to make and dust that lightly with cornmeal.
Punch down the dough and divide it into four grapefruit-sized balls. Flour a board and a rolling pin and roll out to the width of your baking sheet. Bonus points if you pick it up and toss it in the air to stretch it. This will delight your kids. Extra credit if you give one quarter of the dough to your kids to try tossing. Don’t worry if they drop it on the floor. You’ve got three more crusts, remember?
When the dough is nice and stretched out, lay it out on the pizza peel/baking sheet. Drizzle lightly with olive oil. Add your favorite pasta sauce, cheese, and toppings. Place in the oven either on the pizza stone or in the baking sheet. If you like a crispy crust, pour 1 cup of water into the broiler pan at the bottom of the oven. This will fill the oven with steam and paradoxically create a lovely, crispy outer crust. Bake for about 8 minutes or until the crust turns slightly golden brown and all the cheese is melted. Allow to cool for about five minutes before cutting. Enjoy!


Apr 22, 2020 | Cooking, Recipes |
 There’s something about snow in the middle of April that makes me want comfort food, and for me there’s no greater comfort than my abuela’s tortillas. It’s also a nice recipe to have in the middle of a pandemic if you’re running low on yeast. (Spoiler: I still have plenty of yeast, I buy it in bulk. I just really wanted tortillas.)
I remember helping Abuela make these in her kitchen. She’d hand me a chunk of dough and a rolling pin and let me roll to my heart’s content. She would roll hers perfectly round. Of course, my tortillas came out looking like houses or Alaska or the occasional deformed hippopotamus, but that doesn’t matter. They still taste wonderful.
For a long time, I didn’t have this recipe because there was none. Abuela would just shake some flour into a bowl until it looked right, grab a handful of baking powder and a few pinches of salt, and mix it all by hand. Finally, one of her neighbors forced her to measure all the ingredients as she went, and this recipe is the result.
Abuela’s Tortillas
- 5 cups all-purpose flour plus additional flour for dusting
- 1 heaping tablespoon baking powder
- 1-1/2 teaspoons salt
- 2 tablespoons vegetable shortening
- ~2 cups hot water
Combine dry ingredients thoroughly. Mix in shortening with your hands until you have a dry, crumbly, even consistency. Gradually add water and mix until dough becomes almost smooth. You may need more or less water depending on humidity levels. Knead the dough for about five minutes.

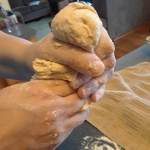 Tear off a chunk of dough and squeeze it through your thumb and forefinger, about the size of a golf ball. Then, digging your fingers into its base, flatten the ball into a disc about two inches across that’s slightly hollow underneath. Line these up on a floured board and cover with a cloth to keep moist.


Roll the discs into tortillas using a small rolling pin. Put flour on the rolling pin to keep it from sticking to the tortilla. I recommend giving the tortilla a quarter, rolling again, and repeating until you have a nice round tortilla.

 Cook on an ungreased hot skillet or electric griddle at 400F until brown spots appear on bottom, then flip and repeat. Watch them carefully and turn frequently or they will burn, and the skillet will be hard to clean. Makes about 18 6-inch tortillas.
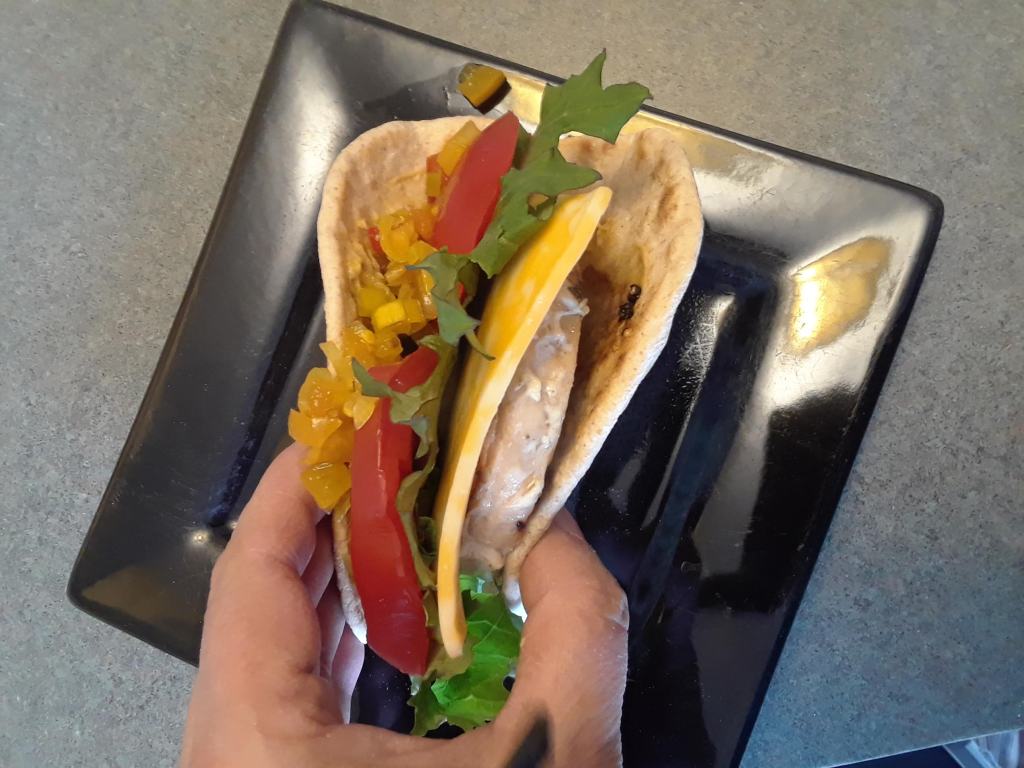
For lunch, I made myself a delicious fish taco with a mahi mahi patty, fresh tomato slices, colby jack cheese, baby kale, and green tomato relish.
Apr 15, 2020 | Cooking, Recipes |

I don’t know about you, but all the days of the week have been blurring together. Last Wednesday blew right past me, and I didn’t even notice until Friday, at which point Easter was upon us. So I’m sorry that I missed last week’s recipe. I remembered today!
My elder daughter loves bagels for breakfast. She would eat them for lunch and dinner, too, if I let her and often snacks on them. But bagels are hard to come by right now, when I’m trying to avoid going to the grocery store for as long as humanly possible. Fortunately, there’s a type of bread she loves even more than bagels. When we visited Sweden in the summer of 2018, my daughter fell in love with the flatbreads that most Swedes eat for breakfast with butter, cheese, and ham or other cold cuts. The bread is light and fluffy, even though it’s thin, rather like a very slender bun, and it’s slightly sweet. It forms the base for a simple, relatively healthy breakfast, and I resolved to try making this odd bread.
However, finding a recipe has been harder than I expected. Part of the problem is that I don’t remember what they’re called. Some searching turned up a bread called hönökaka, named for the island of Hönö from which it originates, but this bread is twelve inches in diameter, whereas the breakfast breads we remember were just six inches wide. I decided to try it anyway and adjust as best I could, rolling out nine flatbreads instead of six. These turned out to be too thick but otherwise quite acceptable and tasty. We just sliced them in half and used them as sandwich thins. I also had to use brown sugar instead of Lyle’s Golden Syrup, which was recommended in most hönökaka recipes, but I am hoping to acquire some for my next batch. I based this largely off of this recipe but made some obvious modifications. Here’s what I came up with:
Swedish Breakfast Flatbread
- 1.5 tablespoons dry yeast

- 2 cups lukewarm water
- 1/4 cup soft light brown sugar or 1/4 cup Lyle’s Golden Syrup
- 2-3 cups rye flour
- 3-4 cups white flour, plus extra for dusting
- 1 tablespoon salt
- 7 tablespoons butter, at room temperature
- Optional: one tablespoon butter, melted
- Dissolve the yeast in the lukewarm water in the bowl of a stand mixer. Mix for a minute or so, then add the sugar/Lyle’s golden syrup and mix again to dissolve. Add two-thirds of each of the two flours, plus all the salt, and start mixing. You may not need all the flour, which is why you start with the amount indicated, then add more of each as you need it. Add the 7 tablespoons of softened butter and keep mixing until it is incorporated. Add more of the flours as needed. When the dough starts letting go of the sides of the bowl (after around 5 minutes of kneading in the machine and with enough flour added), cover the dough and leave to rest in a warm place for around an hour, or until it has doubled in size.
- Turn the dough out onto a floured surface and knead, then cut it into twelve equal-sized pieces. Roll each one out to a circle with a diameter of 6 in., then prick all over with a fork and place on baking parchment or a floured pizza peel. Leave to rise again under a tea towel/dish towel for around 40 minutes.
- Preheat the oven to 475°F. If you have a pizza stone, place it in the oven. Otherwise, place baking sheets in the oven at this stage, as placing the hönökaka on a hot sheet or pizza stone speeds up the baking on the underside of the bread.
- Prick again with the fork just before you pop the bread into the oven (you may need to bake them in batches). Bake for around 8 minutes, but keep an eye on them, as they can go brown quickly due to the sugar content. You want them slightly golden but not overly brown.
- Remove from the oven and move to a cooling rack. If you want a softer crust, brush with the melted butter.
 While the traditional method is to eat them with butter, cheese slices, and ham, I made myself a nice thick sandwich using leftover Easter ham, Swedish mustard and hot mustard, mashed avocado, green tomato relish, red tomato slices, and slices of Jarlsberg cheese. Delicious!
Apr 1, 2020 | Cooking, Recipes |

I’ve been meaning to try this recipe forever. It came with a set of copper gear cookie cutters I bought many years ago. I’d purchased Fibonacci cookie cutters for my (alas, cancelled) book launch, and I thought this recipe would be perfect to try them out on. They’re not incredibly tasty – not too sweet or nor very rich, but I think they’re meant as substrates for icing, in which case they work very well.
CHOCOLATE CUT-OUT-COOKIES
1-3/4 c butter (no substitutes)
2 large eggs
2 c brown sugar
2 t vanilla
1 t water
4-1/2 c flour
1/2 c cocoa powder
Cream together: butter, eggs, brown sugar, vanilla, and water. Gradually add cocoa powder and flour. Divide dough into 3 balls, wrap in wax paper, and chill.
When ready to bake cookies, let dough soften slightly, roll out onto floured board to 1/4″ thickness, and cut out with floured cutters. Place on lightly greased baking sheets (I totally forgot to grease the sheets, and they came off just fine), and bake in a 350 degree oven for about 10 minutes. Cool on cookie sheet for 1 minute (this is important – they fall apart otherwise) and then remove to cooling rack. Cool completely before you decorate.
Enjoy!
Mar 27, 2020 | Books |

Well, keeping up with blog posts while coping with a stay-at-home order, restless kids, and no Internet connection for two days has made this a very interesting week. It also scotched all my clever plans for live Q&A sessions and clever activities. But there is a silver lining! Fabulous photographer Leah Cirker-Stark took this fantastic photo of my books for me. These are hard times for a photographer who usually does portraits, but if you have products that need to look fabulous, I highly recommend her work!
Most kids seem to be settling into a good schoolwork routine, so I’m going to stop posting activities, hunker down and get back to writing A Wizard’s Warning. I hope you all find great, fun, creative things to do at home, and that you all stay safe and well.


Recent Comments