Jul 1, 2020 | Cooking, Recipes |

Today is the first day of July, that glorious time of summer when farmers’ markets are flush with delicious fresh fruit. Rhubarb ripens early, the advantage of being the stalk of a plant rather than the more complex fruit, but berries are usually close behind. Here in New England, the strawberry season is just ending, unless you are lucky enough to have everbearing strawberries, and the raspberry season is just getting started. So this is the ideal time to experiment with pies.
I confess: raspberry rhubarb is my number one, all-time favorite pie, especially with a nice dollop of ice cream on top. I know not everyone likes raspberries (you know who you are), and I can respect that, especially since that leaves more raspberries for me. So this recipe is flexible, allowing you to use as much of either berry as you like. The goal is to have around 5.5 to 6 cups of fruit total for a 9-inch pie, 6 to 7 cups for a 10-inch pie. You can also adjust the amount of sugar you use depending on how tart you like it. For a very tart pie, use just 3/4 cup. For a rather sweet pie, use 1.5 cups. And you want a nice flaky, buttery crust to complement the tartness of the fruit.
For some unfathomable reason, I haven’t ever posted my crust recipe, so let’s start with that. This is my mother’s recipe, and it’s actually a quiche crust recipe, but it is so very, very good that I use it for nearly every pie I make. The critical thing is to never touch the crust with your hands. Use a fork or a dough blender, but keep the dough nice and cold. That’s how it stays flaky.
Pie Crust
- 3 cups all-purpose flour
- 1 teaspoon salt
- 1 egg, lightly scrambled
- 1 Tablespoon vinegar
- 1.5 cups butter/vegetable shortening/coconut oil (but really, butter is best)
- 7 Tablespoons ice water
Combine dry ingredients in a large bowl. Blend in butter/shortening. Combine wet ingredients separately and add to flour mixture. Mix well without touching the crust with your fingers, adding ice water as needed until the crust is still crumbly but largely sticks together. Roll to about 1/8-inch thickness. Makes two crusts.
Now for the pie:
Strawberry Raspberry Rhubarb Pie
- Two pie crusts
- 3-4 cups chopped rhubarb
- 1-2 cups sliced fresh strawberries
- 1-2 cups fresh raspberries
- 3/4 to 1.5 cups sugar
- 4 Tablespoons corn starch
- 2 teaspoons dried orange peel or fresh orange zest
- Optional: one egg white
Preheat oven to 350 degrees Fahrenheit. Line a 9- or 10-inch pie plate with one pie crust. Combine all fruit, sugar, corn starch, and orange zest in a bowl, stirring to coat fruit thoroughly. Pour into pie plate and distribute evenly. Cover with remaining pie crust and crimp together edges. Slash the top crust several times to allow filling to vent. If desired, brush top crust with egg white for shiny finish. Place on a baking sheet in oven and bake for about an hour or until crust is golden brown and filling is bubbling. Remove and allow to cool 10-15 minutes before serving or filling will not set (though it will be no less delicious if it’s runny). Serve hot or cold with vanilla ice cream or whipped cream.
May 27, 2020 | Cooking, Recipes |

Update: this post was originally stated that this is deep dish pizza. A native Chicagoan corrected me; it is properly called “stuffed” pizza, which it certainly is.
I lived in Chicago for exactly one year while my husband was finishing up graduate school, but that was more than enough time for me to fall in love with Chicago stuffed pizza. I miss it so much! For many years, there was one fairly decent Chicago-style pizza joint in Boston, but they closed about three years ago, leaving a pzza-sized hole in my heart.
But if you can make homemade pizza, you can make half-way decent stuffed pizza, too. All you need is some extra crust and a springform pan. You can stuff the pizza with a wide variety of ingredients. This evening, I used hot Italian sausage, spinach, fresh mozzerella, and homemade tomato sauce. But you can add in whatever you like: ground beef, ham, bacon, pepperoni for the meat lovers; broccoli, sauteed eggplant, zucchini, or peppers, asparagus, caramelized onions, fresh basil for the veggie lovers. You can use fresh or aged or smoked mozzerella, a vegan cheese substitute, or (heresy!) none at all. But it must be topped with tomato sauce, or it’s just not deep dish. You can use any jar of tomato sauce, but for authentic pizza flavor, look for a sauce with fennel seed in it. Or you can make your own, as I do below.
Putting the tomato sauce on top of the second crust ensures that the bottom crust doesn’t get too soggy. Similarly, I like to pre-cook my sausage or ground beef before I put it in the crust so I can drain off some of the grease. This also speeds up the cooking process, but if you don’t have time, that’s okay. You can put raw meat in there, and it will cook just fine. It’s also a great way to use up leftovers.
Chicago-Style Stuffed Spinach and Italian Sausage Pizza
- 8 oz. crushed tomatoes
- 1 Tablespoon garlic-infused olive oil
- dried oregano, basil, parsley and fennel seed to taste (about 1/2 to 1 teaspoon each)
- 1/2 teaspoon salt
- 1/8 teaspoon ground black pepper (fresh is best)
- 1 lb. sweet or hot Italian sausage
- 1 lb. fresh spinach leaves, chopped
- Enough dough for two pizza crusts (see here for a recipe)
- Flour for the board
- 1/2 lb. fresh mozzerella
Preheat the oven to 450 degrees F. Assemble a 9-inch or 10-inch springform pan and either spray it or brush it with oil. If you don’t have a springform pan, you can use a cake pan, but getting the slices out will be tricky.
In a small saucepan on medium low heat, stir together the tomatoes, oil, and seasonings and simmer while you assemble the pie.
Slice the Italian sausage into small rounds and cook in a skillet over medium heat until cooked through. Add in the spinach and saute with the sausage until cooked.
 Flour a board or surface. Take a small handful of dough from one crust and add it to the other. Roll it out fairly thin and place it in the springform pan with the edges overlapping the outside of the pan. With a slotted spoon, transfer the sausage and spinach mixture to the pan. Don’t let the dough fall in! Top with slices of mozzerella.

 Roll out the remaining dough and place on top of the mozzerella. Crimp together the edges of the two crusts, taking care not to tear the crust along the way and forming a raised ridge of dough around the outer edge. Top with a thick layer of tomato sauce (you may have some left over), but do not allow the tomato sauce to dribble down the sides or the pizza will stick to the pan.


Bake in the oven for 25 minutes or until the crust turns a nice golden brown and the tomatoes have reduced to a thicker topping. Remove and let rest for at least 5 minutes before removing the springform collar. Slice and serve.
May 20, 2020 | Cooking, Recipes |

Sometimes the back of my refrigerator gets cluttered with tiny bits of leftovers, especially now when everyone is home, eating every meal together. If there’s not enough for everyone, I tend to make another whole meal. So today, I decided to use up all the leftovers in one of my favorite quick meals: a frittata.
Frittatas are essentially crustless quiches, or perhaps elevated omelets, and they are endlessly flexible. They’re appropriate for any meal of the day and an excellent dish to serve to vegetarian guests. The one ingredient you must have is eggs. Everything else is negotiable, and this makes the frittata a wonderful way to use up all those leftovers. Chopped tomatoes? Sweet potato fries? Corn kernels? Forgotten greens? A lone, unloved breakfast sausage? An odd end of cheese? Throw it all in. It’ll work! Trust me.

 My frittata today used leftover sauteed peppers as well as additional fresh chopped peppers; spinach I sauteed the night before with bacon, leek greens, and soy sauce; an odd end of zucchini, sliced thin; some mushrooms I’d fried up in butter a week ago; and a spoonful of diced Hatch green chiles for punch. I sauteed the fresh ingredients in more butter, then added and reheated the cooked ingredients.

 I scrambled six eggs with salt, pepper, and home-dried thyme and sage and threw it into the skillet, no mixing required, and let it simmer on medium low heat. I topped it all with gruyere cheese that had gone a little fuzzy. Mold on cheese isn’t necessarily a bad thing – mold’s an essential part of cheese and gives it its tang. If your fuzzy cheese smells off, throw it out, but if it just smells strongly cheesy, you can cut the fuzzy bits off and use the remaining cheese (as soon as possible). I gave my gruyere a shave, grated it up and tossed it on top of the egg mixture, then put the whole skillet in the oven to bake.
NOTE: Make sure you use an oven-proof skillet, and be careful after you take it out. I’ve burned my hand on a hot skillet handle before. To be safe, put a hot mitt over the handle after you set the skillet on the table to serve your frittata.
Not quite confident enough to take the wild frittata leap? Here’s a seasonally-appropriate recipe from one of my favorite cookbooks, the Gardener’s Community Cookbook. I’ve replaced the one ingredient, baby artichokes, with asparagus, as that’s much more likely to be a leftover lurking in your fridge.
Sweet Spring Frittata
- 2 Tablespoons olive oil
- 3/4 pound Yukon Gold potatoes, sliced 1/4 inch thick
- 1/2 cup asparagus spears, cut into 1-inch pieces
- 2 small sweet onions, finely chopped
- 2 large cloves garlic, coarsely chopped
- 5 large eggs
- 1/4 cup grated Parmesan cheese
- 1/4 cup Monterey Jack cheese
- 1 Tablespoon minced fresh rosemary leaves
- 1/3 cup finely chopped fresh Italian parsley leaves
- 1 teaspoon salt
- 1/2 teaspoon black pepper
Preheat the oven to 375 degrees F. Heat the oil in a 9- to 10-inch ovenproof skillet. Add the potatoes, turn to coat, and saute over medium-high heat until lightly browned, about 10 minutes. Add the asparagus, onions, garlic, and 3 tablespoons water and stir to mix. Cover the pan and cook over medium heat until the potatoes and asparagus are tender, about 8 minutes.
Meanwhile, lightly beat the eggs in a medium bowl. Beat in the remaining ingredients. Pour the egg mixture over the vegetables in the skillet and continue to cook, shaking from time to time, until the bottom is lightly browned, about 10 minutes. Transfer the skillet to the oven and bake until the top is lightly golden and set but not hard, 8 to 10 minutes more. Serve right away or at room temperature.
NOTE: I almost never mix the cheese into the eggs because it slows down the cooking of the eggs. Instead, I sprinkle it on top just before I put the skillet in the oven, which also gives the frittata a lovely cheesy crust. However, this does make it harder to tell if the eggs are fully cooked. Give the skillet a little shake; if it doesn’t wobble, it’s ready.
I’d love to hear about what fridge leftovers you tossed into your frittata! Let me know in the comments.
May 13, 2020 | Cooking, Recipes |

I was all set to write about baking bread today. Then I read that there’s a shortage of flour and yeast. What??? It seems that Americans everywhere have become obsessed with baking, especially sourdough baking, and this is causing shortages in grocery stores. I was vaguely aware of this – it’s hard to avoid all the pictures of homebaked everything on Facebook, and a friend just send me some desiccated sourdough starter of my very own – but it wasn’t until today that I encountered the term “flour privilege.” Millie would be horrified.
I guess I’m one of the privileged, entirely by accident. I buy my flour in bulk and have for years. I have two canisters that hold 25 lbs. of flour each, one for white and one for whole wheat, the latter of which I recently loaned to a good friend when we split a 50-lb. bag of bread flour. My whole wheat now resides in a 10-lb. container, and it’s still a little more than half full after the four loaves of bread my elder daughter made today. I just ordered 20 lbs. of rye flour (a four-pack of 5-lb. bags because I don’t go through it as quickly). And yes, I also buy yeast in bulk, usually in 1-lb. packages, and have been sharing it with friends as well.
It hadn’t occurred to me that some people might be having trouble finding yeast in the stores, or even basic flour, and I don’t want to flaunt my flour privilege! Instead, let’s make something that requires no flour or yeast at all and teaches us a little science along the way: ice cream.
Wait! you say. Don’t you need an ice cream maker for that? Well, spoiler, I have one of those, but it’s not necessary. Ice cream needs no technology more advanced than zippered plastic bags and eager, energetic children. If you have those and a few simple ingredients, you are all set.
Ice Cream in a Bag
- 1 cup half and half (or 1/2 cup milk and 1/2 cup cream)
- 1.5 teaspoon vanilla extract
- 1 Tablespoon sugar
- ice
- 1/4 cup salt (rock salt is best, or at least cheapest, but any salt will do)
- Zippered plastic bags, 1 small and 1 large
Place the first three ingredients in the small zippered bag and seal it well, squeezing out as much excess air as possible while you seal it. This is important. If your bag doesn’t seal well, or if it pops open because it has too much air in it, you will end up with yucky, salty ice cream. You can try double-bagging it or adding some duct tape to make certain it stays shut.
Place the ice and salt in the large zippered bag, then add in the VERY WELL-SEALED small zippered bag. Seal the large zippered bag as well.
Convince your excited, enthusiastic children who have been cooped up for entirely too long to put on their warm winter gloves. They will look at you like you’ve gone insane, but that’s all right. Most children will do just about anything for ice cream. Once they’ve got their gloves on, hand them the bag and tell them to shake it HARD until the liquid turns mostly solid. If your children are very young, I recommend that you do this outside, just in case. Note: they will get impatient. They will whine and complain that they’re tired and they want the ice cream RIGHT NOW. Point out that the longer they shake it, the better it will taste.
Eventually, the cream will, in fact, solidify, and you’ll get about two small servings of ice cream out of it. I recommend cutting one corner of the very well-sealed bag and squeezing it out like soft serve as this is much less messy and awkward than trying to spoon it out of the bag. Best of all, your children will be tired enough from all that shaking to offset the sugar rush they’re about to get from the ice cream.
And now, SCIENCE!
What? Despite all my warnings, the salt got into your ice cream, and it tastes disgusting? You want to know why we needed the salt in the first place? Well, I am so glad you asked me that!
Salt makes ice colder.
Wait, you don’t believe me? After all, we use salt to make ice melt on sidewalks, right? Doesn’t that make ice warmer?
Actually, that’s not exactly what happens. Salt lowers the temperature at which water freezes. Water usually freezes at 32 degrees F, but milk and cream won’t freeze until they’re even colder. When you add salt to the ice, some of the ice will melt, but the mix of this water and the remaining ice will get even colder, cold enough to freeze the cream. This is why your kids need their gloves – the bag will get very cold! And this is why they need to keep shaking the bag, to circulate the cold slushy mix around the smaller bag and also to keep ice crystals from forming inside the cream, the way it does when you try to refreeze melted ice cream.
See! You’ve just taught your kids the concept of melting points and conned them into making their own dessert. YOU ROCK! If you’d like to try this again while channeling your inner PE coach as well, you can purchase an ice cream kick ball, which the kids can kick all around the yard to make their ice cream. I do recommend buying rock salt along with it. It’s much less expensive, though it has impurities that make it even nastier to eat. Fortunately, the kick ball is much better at keeping the salt out of the ice cream.
(Psst! Kids! This is a fantastic way to convince parents to let you eat ice cream pretty much any time! Just tell them you’re learning science and getting exercise at the same time. Then tell them they’re epic for being such cool parents.)
If you’re still disappointed because you don’t have any yeast and can’t make bread, here’s an Irish soda bread recipe (don’t worry, there’s a smaller version of the recipe so you don’t end up making enough for 250 people). And if you have no flour at all, here’s a great Swedish cake recipe made with mashed potatoes and ground almonds.
Apr 29, 2020 | Cooking, Recipes |

These days, I find myself making a lot of things from scratch that I might not ordinarily make: ice cream, pasta sauce, bread. Okay, actually, I make bread all the time, but not usually in these quantities! But I realized that if I’m making that much bread dough, I may as well make other fun things out of it, such as pizza. It’s really pretty easy to make at home, especially if you have a pizza stone. If you don’t, no worries. An ordinary baking sheet will do.
The lovely thing is, you can top it with whatever you have handy. You don’t have to use mozzerella. Try goat cheese, blue cheese, or cheddar with cooked ground beef to make a cheeseburger pizza. Find toppings in the back of your pantry, freezer, or fridge: olives, anchovies, spinach, broccoli, butternut squash, breakfast sausage. No tomato sauce? Try alfredo sauce or plain olive oil for a white pizza. Experiment! This is a great opportunity to try new things.
Start with the crust about 2.5 hours before dinnertime.
Pizza Crust
(This is just a simple white bread recipe. If four crusts is too much for you, you can put half the dough in a loaf pan and make nice white sandwich bread. You can also refrigerate the dough for up to a week. Just let the dough warm up for 20 minutes before rolling it out.)
- 1.5 Tablespoons dry yeast
- 1.5 Tablespoons salt
- 3 cups lukewarm water
- 6.5-7.5 cups all-purpose flour
Throw these willy nilly into a mixer bowl and knead using a dough hook or by hand until the dough is smooth, pulls away from the sides of the bowl, and stops sticking to your fingers. You may need to add extra flour on a humid day. Cover loosely and allow to rise for two hours.
About 15 minutes before the dough finishes rising, preheat the oven to 475 degrees F. If you have a pizza stone, put it in the  oven now. If you like a crispy crust, add the bottom of a broiler pan on the lowest rack. If you are using a pizza stone and have a pizza peel, dust the peel with cornmeal. Otherwise, a baking sheet with parchment paper for each pizza you plan to make and dust that lightly with cornmeal.
Punch down the dough and divide it into four grapefruit-sized balls. Flour a board and a rolling pin and roll out to the width of your baking sheet. Bonus points if you pick it up and toss it in the air to stretch it. This will delight your kids. Extra credit if you give one quarter of the dough to your kids to try tossing. Don’t worry if they drop it on the floor. You’ve got three more crusts, remember?
When the dough is nice and stretched out, lay it out on the pizza peel/baking sheet. Drizzle lightly with olive oil. Add your favorite pasta sauce, cheese, and toppings. Place in the oven either on the pizza stone or in the baking sheet. If you like a crispy crust, pour 1 cup of water into the broiler pan at the bottom of the oven. This will fill the oven with steam and paradoxically create a lovely, crispy outer crust. Bake for about 8 minutes or until the crust turns slightly golden brown and all the cheese is melted. Allow to cool for about five minutes before cutting. Enjoy!


Apr 22, 2020 | Cooking, Recipes |
 There’s something about snow in the middle of April that makes me want comfort food, and for me there’s no greater comfort than my abuela’s tortillas. It’s also a nice recipe to have in the middle of a pandemic if you’re running low on yeast. (Spoiler: I still have plenty of yeast, I buy it in bulk. I just really wanted tortillas.)
I remember helping Abuela make these in her kitchen. She’d hand me a chunk of dough and a rolling pin and let me roll to my heart’s content. She would roll hers perfectly round. Of course, my tortillas came out looking like houses or Alaska or the occasional deformed hippopotamus, but that doesn’t matter. They still taste wonderful.
For a long time, I didn’t have this recipe because there was none. Abuela would just shake some flour into a bowl until it looked right, grab a handful of baking powder and a few pinches of salt, and mix it all by hand. Finally, one of her neighbors forced her to measure all the ingredients as she went, and this recipe is the result.
Abuela’s Tortillas
- 5 cups all-purpose flour plus additional flour for dusting
- 1 heaping tablespoon baking powder
- 1-1/2 teaspoons salt
- 2 tablespoons vegetable shortening
- ~2 cups hot water
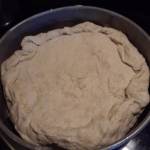
Combine dry ingredients thoroughly. Mix in shortening with your hands until you have a dry, crumbly, even consistency. Gradually add water and mix until dough becomes almost smooth. You may need more or less water depending on humidity levels. Knead the dough for about five minutes.

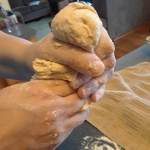 Tear off a chunk of dough and squeeze it through your thumb and forefinger, about the size of a golf ball. Then, digging your fingers into its base, flatten the ball into a disc about two inches across that’s slightly hollow underneath. Line these up on a floured board and cover with a cloth to keep moist.


Roll the discs into tortillas using a small rolling pin. Put flour on the rolling pin to keep it from sticking to the tortilla. I recommend giving the tortilla a quarter, rolling again, and repeating until you have a nice round tortilla.

 Cook on an ungreased hot skillet or electric griddle at 400F until brown spots appear on bottom, then flip and repeat. Watch them carefully and turn frequently or they will burn, and the skillet will be hard to clean. Makes about 18 6-inch tortillas.
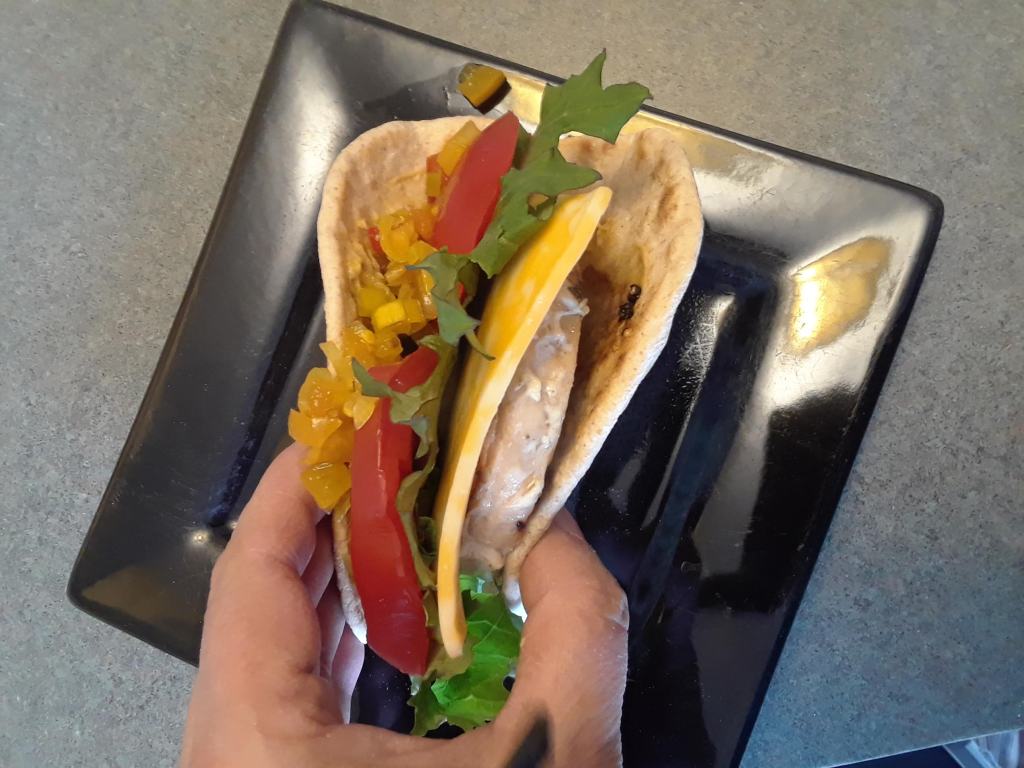
For lunch, I made myself a delicious fish taco with a mahi mahi patty, fresh tomato slices, colby jack cheese, baby kale, and green tomato relish.


Recent Comments