Nov 1, 2017 | Cooking, Recipes |

Do you throw out your jack-o-lantern after Halloween? Hope not, because you’re throwing out a whole lot of delicious!
While sugar pumpkins are the sweetest of holiday squash, all pumpkins are edible and usable, even after you’ve carved them and left them out overnight. And there are so very many things you can do with pumpkin. Muffins are just one example.
To render your jack-o-lantern edible, first wash or carve off any marker or crayon on the outer shell. If you used paint, you may have to carve it off. If you used a wax candle inside the pumpkin, cut away any wax drippings or scorched bits. Basically, you want nothing but pumpkin going in your oven.
Spray a baking sheet with canola oil or rub it with butter. Then cut your pumpkin (roughly) in half and set it on the baking sheet with the cut edges down. Bake the pumpkin at 400 degF until it becomes soft and a fork easily penetrates the shell. This will take between 30 and 60 minutes, depending on the thickness of your pumpkin.
Let your pumpkin cool completely. Using a tablespoon or ice cream scoop, scoop the pumpkin flesh off of the shell. Use a blender or food processor to puree the flesh until it’s smooth. You can now use this puree in place of canned pumpkin in any recipe, or you can place it in freezer bags and freeze it for later holiday baking.
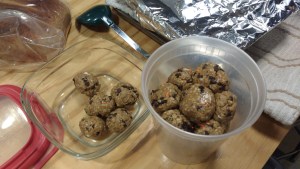
 Remember me telling you that I was cooking lamb-in-a-pumpkin supper for 30 last week? I actually only had 26, and I vastly overestimated the size of the pumpkin to cook the stew in, so I ended up with a LOT of leftover roasted pumpkin. (The smaller pumpkin in the photo was a vegan version substituting white kidney beans and sauteed oyster and portobello mushrooms for the lamb.)
Last night, I rinsed some of the flesh, so it wouldn’t taste too much of stew, pureed it as above, and used the following recipe, which I found on ThisGrandmaIsFun.com, to make pumpkin muffins for Nora’s Halloween party today. I modified it in one way: I added raisins and dried cranberries. I also tripled the recipe below and found that it made 60 small (not mini) muffins, so the recipe below should make 20, not 12 as the original recipe states.
RECYCLED JACK-O-LANTERN PUMPKIN MUFFINS
- 1¾ cups all purpose flour
- 1 cup granulated sugar
- ½ cup brown sugar
- 1 teaspoon baking soda
- ½ teaspoon baking powder
- ½ teaspoon salt
- 2 teaspoons ground cinnamon
- ¼ teaspoon ground cloves
- ¼ teaspoon ground nutmeg
- 2 large eggs
- 2 cups pure pumpkin puree
- ½ cup coconut oil, melted
- 1 tablespoon whole milk
- 1 teaspoon vanilla extract
- 1/2 cup mixed raisins, golden raisins, and dried cranberries
- Preheat oven to 375° F. Line a muffin pan with paper liners or grease with nonstick spray. Set aside.
- In a medium bowl, combine the flour, sugar, brown sugar, baking soda, baking powder, salt, and spices. Whisk to combine and set aside.
- In a small bowl, combine the eggs, pumpkin puree, coconut oil, milk, and vanilla extract. Whisk to combine. Pour the wet mixture into the dry ingredients and fold to combine. The batter will be thick.
- Stir in the raisins and cranberries.
- Using an ice cream scoop or 1/4 cup measuring cup, scoop the batter into the prepared muffin pan. Keep stirring occasionally to keep the raisins and cranberries from settling to the bottom.
- Bake for 22-24 minutes, or until a toothpick inserted into the center of a muffin comes out clean. Let cool for at least 5 minutes before removing the muffins from the pan. Serve.
These are a great treat to serve on chilly mornings with breakfast or as an alternative to pumpkin pie on Thanksgiving.
Happy November, everyone!

Oct 25, 2017 | Cooking, Recipes |

Time for more Halloweeny goodness! For cooking (and nearly everything else), fall is my favorite season. You still have most of the delicious summertime crops, but you’re now also getting mature fall crops: winter squashes, cold-weather kale, frost sweetened root veggies, etc. Oh, yes. And lamb.
Wait! you say. Isn’t lamb a spring meat? Actually, no. In fact, that makes almost no sense. Lambs are born in the spring, and when they are born, they are tiny. Most sheep farmers want some time to let their lambs grow and fatten up a bit, harvesting them at about six months old. Thus, lamb is typically harvested in the fall. That’s one reason why, come Easter, you see so much lamb from Australia and New Zealand – it’s fall there. Here in New England, fall is when you find good, fresh, peak lamb. I highly recommend Chestnut Farms for the excellent quality of their meat and especially their lamb.
When I got lamb stew meat in my last meat share, I knew exactly what I was going to do with it. This recipe brings together nearly all of my favorite fall flavors: kale, pumpkin, heirloom tomatoes, and lamb, with just a hint of chile. I found this recipe in the Gardener’s Community Cookbook, my go-to for figuring out what to do with your farmshare or garden surplus. Of course, I’ve meddled with it a bit, adding kale, for example. My husband hates cinnamon, so I substitute nutmeg.
LAMB-IN-A-PUMPKIN SUPPER (Serves 8)
- 1 medium pumpkin (6 to 8 pounds)
- 1/4 cup vegetable or olive oil
- 2 pounds lean lamb stew meat, cut into 1-inch pieces
- 4 cloves garlic, minced
- 1 large onion, not too finely chopped
- 1/4 cup all-purpose flour
- 1 cup light beef broth
- 1/4 cup brandy
- 4 cups coarsely chopped fresh or canned tomatoes and their juices
- 1 bunch kale, stems removed, coarsely chopped
- 1 teaspoon red chile powder or smoked paprika
- 1 teaspoon ground cinnamon or nutmeg
- 1 tablespoon brown sugar
- 1 teaspoon salt
- 1/2 teaspoon black pepper
- Roasted pumpkin seeds, for garnish (optional)
Wash the exterior of your pumpkin thoroughly with soap. Cut off the top of your pumpkin as if preparing for a jack-o-lantern. You’ll need that pumpkin top for a lid later, so try to cut it off cleanly. Scoop out the seeds and connecting membranes. (Save the seeds if you want to roast them for garnish.) With a melon baller, ice cream scoop, or other sturdy spoon, remove the flesh, leaving enough of a wall (1/2 to 3/4 inch thick) to keep the shell intact. Reserve the flesh. Place the pumpkin shell and its lid on a baking sheet and set aside.
Heat the oil in a nonreactive pot until beginning to smoke. Brown the lamb over medium high heat in batches so that the pieces are not crowded in the pan. Transfer to a bowl as you go.
 When all the lamb is browned, reduce heat to medium and add the garlic, onion, and pumpkin flesh (you may need to chop the pumpkin into bite-sized pieces first) to the pot. Saute until the onion is translucent, about five minutes. Add the flour and stir until the flour begins to cook, about two minutes. Pour in the brandy to deglaze, followed by the broth.
Add the remaining ingredients (except the pumpkin seeds for garnish) and the browned lamb along with any collected juices and bring to a boil. Reduce the heat to very low and simmer gently for one hour, until the sauce is thickened and the lamb is almost tender.
While the lamb is simmering, preheat the oven to 350 degF. Ladle the finished lamb mixture into the pumpkin shell and top with the pumpkin lid. Bake for 35 to 45 minutes or until the outside of the pumpkin is golden and nearly soft. If your pumpkin starts to slump a bit, watch out! The bottom cooks faster than the top, and if you try to move the pumpkin, it will break off – stew everywhere! If it has not begun to slump, you can attempt to transfer it to a platter and serve, garnished with pumpkin seeds (optional).
This is a fantastic party dish. For additional wow factor, pour a little brandy on top of the stew, turn off all the lights, and light it! (Warning: this trick works about 50% of the time for me.) I’ve made this dish at least a dozen times, and it never fails to please. Years later, people will run into me and say, Wow, remember that pumpkin stew you made? In a pumpkin?
Last weekend, I tried a variation I’ve been considering for a while: individual pumpkins. We had a family member visiting and celebrating her 80th birthday, which is cause for fancy cooking! Next weekend, I’m making this meal for about thirty people, and I have more family coming to visit, so I thought I’d make the stew in advance, freeze it, then thaw it the morning of the meal, toss it in a jumbo-sized pumpkin, and cook that, easy shmeezy. I quintupled the recipe, planning to use some for the birthday dinner and make up the shortfall with a vegan version next weekend.
 To this end, I bought small, 1-pound-ish sugar pumpkins (yum), but I knew their walls would be too thin to scrape down much, so I also bought two 3-pound pumpkins, which I peeled and chopped. I should note that peeling a fresh pumpkin is MUCH harder than it sounds. I ended up using a good sharp vegetable knife to do the job. Also, there’s no good way to speed up browning the lamb, even if you use a ginormous pot, so budget extra cooking time.
When I cooked the pumpkins, I found that they all cooked at slightly different rates. The one non-sugar pumpkin I used, a small ornamental pumpkin for Nora, actually took the longest to cook and then kept absorbing all the broth out of the stew! Overall, I don’t think I’ll attempt this again. It’s a cute trick but really not worth the effort, and the kids think a gargantuan pumpkin is far more impressive.

Oct 19, 2017 | Cooking, Recipes |

Hi, all. My apologies for not posting on time. Last Monday being a holiday (Indigenous Peoples’ Day!) threw me off, and I just never quite caught my stride. This week, I’m a day late due to excessive creativity.
Halloween is drawing near, less than two weeks away. I’ve been experimenting with no-bake recipes that I could conceivably make at school visits. This one from Baker Mama caught my eye because it also happens to be fairly nutritious, a mixture of peanut butter, honey, and oats with chocolate chips and mini M&Ms thrown in for fun.
Peanut butter isn’t a great choice for schools however, so I’ve altered the recipe to use sunflower butter and nut-free mini chocolate chips. (Check the labels to make certain your ingredients are made in a nut-free facility.) It happens to be naturally gluten-free, and it can be easily made vegan by substituting brown rice syrup for the honey. I suspect molasses might work as well, and today at Spindler Confections, I discovered the existence of cider syrup, which would probably be marvelous in this.
ALLERGEN-FREE MONSTER BALLS
- 2-1/2 cups old-fashioned oats
- 1 cup creamy or crunchy sunflower butter
- ½ cup honey (or brown rice syrup)
- 1 teaspoon vanilla extract
- ½ cup Enjoy Life or other mini chocolate chips
- Halloween-themed sugar sprinkles to taste
Combine the oats, sunflower butter, honey, and vanilla thoroughly, Stir in the chips and sprinkles and mix until roughly homogeneous. Roll into 1- to 1.5-inch balls. If you can refrain from instantly eating them all, refrigerate for up to two weeks.
 We made the basic monster ball recipe above to bring to my daughters’ FIRST LEGO League meeting last Monday night, but Nora and I both thought they were entirely too plain to be called monster balls. Nora tried to decorate the balls but couldn’t get the decorations to stick. Then I had a brainstorm: honey. I happened to be at Michael’s today for other supplies and picked up a few extras: candy eyeballs and candy mustaches, sized for cupcakes but perfect for this purpose. We added coconut and edible green glitter gel for hair, candy corn for horns and legs, candy coated sunflower seeds for eyes, noses, and spines, and some apple raspberry fruit leather for mouths and tongues.

Cyclops, unicorn, and, um, warthog?
The result: far less healthy but much more fun snacks! I wish I’d thought to get red licorice whips for hair, too, and I could see using pretzel sticks or regular licorice for legs. Oh, and if you’re more of a chocoholic, there’s also a version of this that uses Nutella. I don’t quite dare. I may not be able to stop eating them. But if you’re brave enough, try it, and share your photos on my Facebook feed!
EDIT: Remember there are more recipes from A Witch’s Kitchen here.

Oct 3, 2017 | Cooking, Recipes |

Here’s the recipe I’d intended to post last week, before that heat wave hit. Today, it’s cool and in the 60s, with fog in the morning and just a nip of autumn in the air: soup weather.
I have never been a fan of cold soups. They just taste wrong to me, none more so that Russian borscht, beet soup served cold with sour cream. I love beets, but if I’m eating them cold, I want them pickled or in a salad. Even warm, borscht doesn’t thrill me. It’s too simple, just beets and onions and broth and sour cream.
Then I met my husband, whose mother was Ukrainian, and she introduced me to Ukrainian borshch (shown above with a shot of vodka for cold winter nights), which is a rich and varied vegetable soup rather like minestrone, but made entirely with winter vegetables. In the summertime, when my garden is bursting with produce, I will often make something I call borschtrone, and its Italian or Ukrainian character is determined most by whether I have basil or dill to season it with.
The following recipe is the version used for Sviat Vechir, the traditional twelve-course meatless Christmas dinner (more on that later this year), so it works very well as a vegan entree. It can also be easily “beefed up” by substituting chicken stock and adding red kidney beans and/or chunks of kielbasa. Delicious with pierogies (varenyky if you’re Ukrainian) and fresh rye bread.
UKRAINIAN BORSHCH
- 1 cup fresh or dried mushrooms
- 1 large onion, chopped
- 2 cloves garlic, pressed or finely chopped
- 3 Tablespoons vegetable oil (canola or sunflower work well)
- 2 cups beets, diced
- 1 cup carrots, diced
- 1 potato, diced
- 1/2 teaspoon dill (fresh or frozen)
- 1 teaspoon fresh parsley
- 3 cups shredded cabbage (I often substitute kale and/or beet greens)
- 1/2 cup tomato juice or canned or fresh diced tomatoes
- 3 peppercorns
- lemon juice to taste
- salt and pepper
- 8-9 cups water or vegetable stock
If you are using dried mushrooms, place in a bowl and cover with boiling water. Allow to soften and reserve the liquid for later. Slice mushrooms (fresh or reconstituted).
Saute the onion and garlic in oil until transparent. Add mushrooms and saute slightly. Add beets, carrots, and potato and saute until just beginning to soften around the edges. Add cabbage/greens, dill and parsley and cook along with the tomatoes/juice and water/stock. If you used dried mushrooms, include the reserved liquid here, reducing the amount of water/stock accordingly. Season to taste. Simmer until all vegetables are tender. (if you are using an Instant Pot, set it to Stew for 25 minutes). Add lemon juice with caution since you want the borshch tart, not sour. (I have a daughter who dislikes sour things, so I often omit it altogether.) Garnish with additional dill and parsley and serve with optional sour cream or tofu alternative. Serves 6-8.
Sep 27, 2017 | Cooking, Recipes |

It happens to all of us. Every cook tries new recipes, and they don’t always go right on the first try. Or the second. Today, I attempted to make ceviche, a unique Latin American appetizer in which fish is “cooked” using acid rather than heat, the preferred acid being lime juice. It’s a very tricky dish to do well, as I found out.
I had a different recipe all ready to go – Ukrainian borshch – but we hit a record 93 degF in Cambridge today. In the midst of a heat wave, root vegetable soup seemed completely out of season.
I wandered the Arlington farmers’ market, looking for inspiration, and I found it at a stall selling fresh fish. Not heating up my kitchen on a day of record heat sounded like the ideal solution. Half a pound of haddock and several fresh vegetables and herbs later, I was ready to make ceviche.
Saying that this is New Mexican ceviche is something of a contradiction in terms. New Mexican cuisine is largely dictated by local food: chiles, tomatoes, beans, corn. Rice and avocados are imports from Mexico, but even that’s not so far away. One thing that’s almost impossible to get in landlocked, high desert New Mexico is fresh fish. I have caught trout in mountain streams and have fond memories of one amazing morning on the Chama River when the browns were so hungry they were striking bare hooks. Fresh, pan-fried trout remains one of my favorite breakfasts. Still, I can’t imagine trout would work in ceviche. (Know otherwise? Tell me in the comments!)
I have never seen ceviche offered in New Mexican restaurants, which makes sense, since fresh whitefish must be flown in daily at tremendous expense (I’m betting that some insane place offers it anyway). It’s not surprising, then, that my first experience of ceviche was in Burlington, MA, and that was shrimp ceviche, tasty but not outstanding. Then we went to Cape Cod this summer, and my husband and I dined at Tumi, a Peruvian-Italian fusion restaurant, where I tried the mixed seafood ceviche.
It was a revelation. The acidity balanced with the delicate fish captivated me. I couldn’t get enough and ate more than my fair share of the appetizer, which was fine because my husband was having a similar experience with his rocoto relleno appetizer. By the time I had finished the last bit of grilled octopus, I knew that I had to try making ceviche myself as soon as possible.
My first attempt was a dismal failure. Ceviche requires careful timing. I didn’t really understand how long it took to “cook” the fish in the lime juice, and we had to go out that evening, which meant that it was disastrously overdone mush by the time we got home. Today marks my second attempt, using this recipe from Laylita’s Recipes.
It was AWFUL: too acidic, not salty enough, terribly bitter. I made several mistakes.
- I was preparing the ceviche at the same time as some pork carnitas, so I missed the part where the onion and tomato are marinated separately at the end of the cooking process, and I threw in the onion and part of the tomato to cook with the haddock. I suspect the onion may have contributed to the bitterness.
- I also forgot to add salt to the fish before cooking it in the lime juice.
- When I drained the fish, I noticed – too late! – that some of the fish was not fully cooked, and I was out of limes. So I pulled out a bottle of lemon juice, covered the fish again, and cooked it for another 45 minutes. This was a terrible mistake. The lemon juice clashed with the lime juice and was much more acidic without any balancing sweetness. I suspect that this was the main source of the bitterness.
- I tried to salt the fish after adding the remaining tomato, bell pepper, avocado, and cilantro. This just made it salty and acidic and bitter. And mostly inedible. Bleh.
My one success: Hatch green chile. I don’t have Ecuadorian peppers, nor is New England well known for any of its hot peppers, but I did happen to have some Hatch green chile in the fridge that I’d been meaning to use. Even with the nasty bitterness, I could taste the mellow burn of the chile, and I think it would be really excellent in a ceviche done properly.
So, the moral of today’s cooking adventure: do not attempt to cook something totally new while also making something else complicated. Ironically, the pork carnitas was probably the best I ever made, with a wonderful, rich umami flavor to it. I would post that recipe, except that I don’t actually know exactly what I did. I was paying too much attention to the ceviche to really notice. I browned the pork, took it out of the Instant Pot, sauteed the onions and garlic, then added a splash of apple cider vinegar, a dollop of tomato paste, some low sodium chicken broth, mexican oregano, cumin, mustard powder, and Worcestershire sauce, with a sprinkling of salt and freshly ground pepper. Fantastic!
But the fact that I can pull off things like that makes me cocky. I forgot that I’ve made carnitas a million times before, and that ceviche is in a class of cooking I am wholly ignorant of. Next time I try ceviche, it’ll be on a lazy afternoon when I have absolutely nothing else to do, and I can really focus on getting everything right. And I’ll be sure to have extra limes.

Tomatoes, bell pepper, avocado, and cilantro, all headed to their DOOM.

It looks soooooo good, but it tastes soooooo bad.
Sep 20, 2017 | Cooking, Recipes |

Here in New England, the leaves are just starting to turn from green to gold and orange and flaming red. The remnants of Hurricane Jose have been drifting in as fog and wind and rain. It’s chilly and clammy outside, the kind of weather that makes you want to wrap up in a warm blanket, sip a mug of tea with honey, or maybe indulge in a bowl of soup.
This is also the time of year when squash starts appearing at farmers’ markets, when zucchini and crooknecks and pattypans are supplanted by spaghetti, delicata, acorn, and butternut, their sweet golden flesh ready to be put to a vast array of uses. My favorite thing to do with winter squash is to balance its sweetness with something savory, and curry works beautifully.
This recipe comes from one of my favorite cookbooks, The Gardeners’ Community Cookbook compiled by Victoria Wise and given to me by my friend and fellow meals adventurer, Megan.
CURRIED BUTTERNUT SQUASH BISQUE
1 medium butternut squash (about 1-3/4 lb.)
1 tablespoon butter
3/4 cup finely chopped onion
1 clove garlic, minced
1 large cooking apple, such as Cortland or McIntosh, peeled, cored, and chopped into 1/4-inch pieces
1 teaspoon curry powder
1/4 teaspoon grated nutmeg
2 tablespoons all-purpose flour
4 cups chicken broth
1 tablespoon tomato paste
1/2 cup half-and-half
1 tablespoon minced fresh sage leaves or 1/2 teaspoon dried sage
Salt and pepper to taste
Whole sage leaves for garnish
Preheat the oven to 350 degF. Cut the squash in half and remove the seeds. Spray a baking sheet with cooking spray or coat with butter and place the halves cut side down on the sheet. Bake for 45 minutes or until a fork pushes easily into the thickest part of the squash. When mostly cooled, scoop out the flesh.
Melt the butter in a large soup pot. Add the onion, garlic, and apple and cook over low heat until soft, about 10 minutes. Add the curry, nutmeg, and flour and stir until the flour disappears.
With a food processor or blender, puree the onion-and-apple mixture along with the squash and 1 cup of the broth. Return the puree to the pot and stir in the tomato paste, half-and-half, minced sage, remaining broth, and salt and pepper. Heat over medium heat, stirring constantly, until it just begins to boil. Serve immediately, garnished with whole sage leaves.
Variations: for a richer flavor, use light cream in place of half-and-half. For a little more kick, increase the amount of curry, or add 1/2 teaspoon red chile or chipotle powder. If you don’t have butternut squash available, you can substitute 2-3 acorn squash or even a similar-sized pumpkin. If you use pumpkin, save the seeds, roast them, and use them as garnish along with the sage.
If you’re looking for a vegan version of this, I recommend this recipe in the New York Times.


Recent Comments